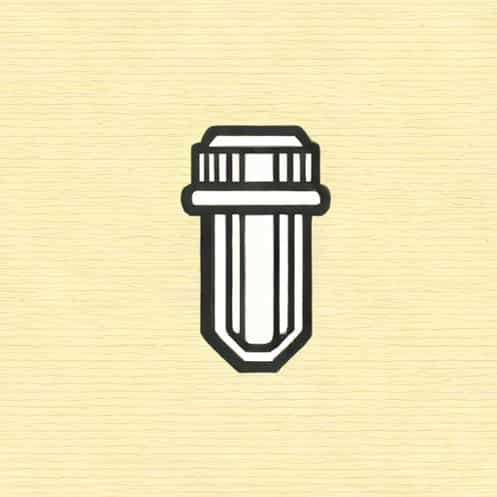
Greasing a grease nipple, also known as a Zerk fitting, is an essential maintenance task for ensuring the smooth operation and longevity of machinery, vehicles, and equipment. These small fittings provide a way to lubricate bearings, joints, and other moving parts that experience friction and wear over time. Regular lubrication through grease nipples helps prevent metal-to-metal contact, reduces heat buildup, and minimizes the risk of mechanical failure. Understanding the proper technique, the tools required, and the safety measures involved is key to performing this task effectively and efficiently.
Understanding Grease Nipples
Grease nipples are small fittings installed on mechanical components that require periodic lubrication. They are commonly found on vehicles, agricultural machinery, industrial equipment, and heavy-duty tools. The fitting allows grease to be injected directly into the bearing or joint without disassembling the machinery, which simplifies maintenance and ensures that critical components receive proper lubrication.
Types of Grease Nipples
There are several types of grease nipples, each designed for specific applications. Some common types include
- Straight NipplesStandard fittings that allow grease to flow directly into the joint.
- Angled NipplesDesigned for hard-to-reach locations, often at a 45 or 90-degree angle.
- Flush or Low-Profile NipplesUsed in tight spaces where protruding fittings may interfere with machinery operation.
Importance of Proper Lubrication
Proper lubrication through grease nipples ensures that moving parts operate smoothly and reduces wear and tear. Neglecting this maintenance task can lead to increased friction, overheating, premature component failure, and costly repairs. Greasing at regular intervals helps maintain machinery performance, extend service life, and prevent downtime.
Tools and Materials Needed
Before greasing a grease nipple, gather the appropriate tools and materials to ensure a smooth and efficient process.
Essential Tools
- Grease GunA manual, lever, or pneumatic grease gun is required to inject grease into the nipple.
- Grease Cartridge or Bulk GreaseUse the manufacturer-recommended type of grease, often specified for the machinery or vehicle.
- Clean Rag or ClothUsed to wipe off excess grease and clean the fitting before and after lubrication.
- Protective GlovesTo protect your hands from grease and provide better grip during the process.
Optional Tools
- Wire BrushFor cleaning dirt and rust off the fitting before greasing.
- Safety GlassesTo protect your eyes from grease splatter.
Step-by-Step Guide to Greasing a Grease Nipple
Step 1 Locate the Grease Nipples
Identify all grease nipples on the machinery or vehicle. Refer to the user manual or maintenance guide to ensure you don’t miss any critical points. Common locations include wheel bearings, suspension joints, steering linkages, and agricultural equipment pivot points.
Step 2 Clean the Nipple
Before applying grease, clean the grease nipple with a rag or wire brush to remove dirt, dust, and old grease. This prevents contamination from entering the bearing or joint, which could reduce lubrication effectiveness and cause wear.
Step 3 Prepare the Grease Gun
Load the grease gun with the appropriate grease. If using a cartridge, insert it according to the manufacturer’s instructions. Make sure there is no air in the gun, as air pockets can prevent smooth grease flow.
Step 4 Attach the Grease Gun to the Nipple
Firmly attach the nozzle of the grease gun to the grease nipple. Ensure a tight connection to prevent leakage. Some grease guns have couplers that lock onto the nipple for better stability during application.
Step 5 Apply Grease
Pump the grease gun slowly and steadily. You will feel resistance as grease fills the bearing or joint. Continue until you see fresh grease oozing out of the edges of the component, indicating that the cavity is full. Avoid over-greasing, as excessive grease can cause seals to rupture or force grease into unwanted areas.
Step 6 Remove and Clean Up
Detach the grease gun carefully, wiping off any excess grease from the nipple and surrounding area with a clean rag. Proper cleanup prevents dirt and debris from sticking to the grease and maintains a neat workspace.
Tips for Effective Greasing
- Follow the manufacturer’s recommended lubrication schedule to avoid under- or over-lubrication.
- Use the correct type of grease specified for your machinery or vehicle, as using the wrong grease can cause damage.
- Check the grease nipples for damage or clogging before application. Replace any faulty fittings.
- Perform greasing in a clean and well-lit environment to prevent contamination.
- Wear protective gloves and eyewear to reduce contact with grease and ensure safety.
Common Mistakes to Avoid
- Using too much grease, which can damage seals or cause grease to leak into unintended areas.
- Neglecting to clean the nipple, allowing dirt or old grease to contaminate the component.
- Skipping lubrication intervals, leading to increased wear and mechanical failure.
- Using the wrong type of grease, which may not provide adequate protection for the specific joint or bearing.
- Applying grease too quickly, which can create air pockets and reduce effectiveness.
Benefits of Regular Greasing
Regular maintenance through greasing provides several long-term benefits
- Reduces friction and wear between moving parts.
- Extends the lifespan of bearings, joints, and other mechanical components.
- Prevents overheating caused by friction.
- Minimizes downtime and costly repairs by maintaining equipment in optimal condition.
- Improves overall performance and efficiency of machinery and vehicles.
Greasing a grease nipple is a straightforward but crucial maintenance task that ensures machinery and vehicles operate efficiently and safely. By understanding the types of grease nipples, gathering the right tools, and following a systematic approach, you can effectively lubricate bearings and joints. Cleaning the nipple, using the correct grease, and applying it carefully will prevent wear, reduce friction, and extend the life of mechanical components. Following regular lubrication schedules and avoiding common mistakes ensures that your equipment remains in top condition, providing reliable performance for years to come.