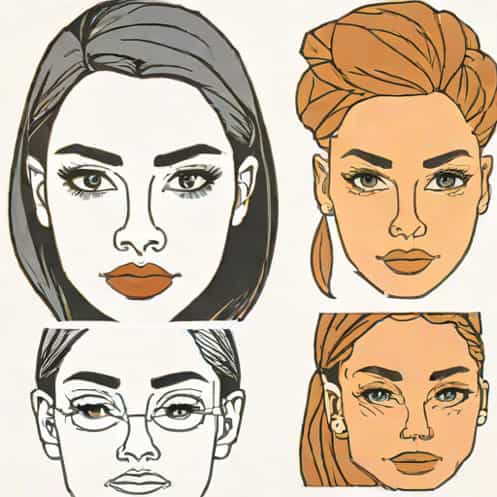
Drawing a realistic face can feel intimidating at first, especially when you look at professional sketches that capture every detail with precision. However, learning how to draw a realistic face becomes much easier once you understand proportions, shading, and the structure of facial features. With practice, patience, and a clear step-by-step approach, anyone can improve their portrait drawing skills. The key is to build the face gradually, starting with basic shapes before adding layers of detail that bring depth, accuracy, and expression.
Understanding Basic Facial Proportions
Before jumping into features, it helps to learn the standard proportions artists use. Realistic portrait drawing relies on guidelines that help you place each feature correctly. These proportions act as a foundation you can adjust later depending on the person you are drawing.
The Head Shape
Start by sketching an oval or egg shape. This will serve as the main outline of the head. Keep the lines light since you will refine the shape later. The top half is slightly wider, while the chin tapers gently downward.
Guidelines for Symmetry
Draw a vertical line that divides the face into two equal halves. This ensures your eyes, nose, and lips stay balanced. Then add a horizontal line across the middle of the oval. Many beginners place the eyes too high, but in realistic drawing, the eyes sit in the middle of the head not above it.
Dividing Facial Sections
To place features accurately, divide the face into additional horizontal segments
- The eye line sits halfway down the head.
- The bottom of the nose is halfway between the eye line and chin.
- The mouth line is about one-third of the way between the nose and chin.
These simple divisions help you build a realistic structure, avoiding common mistakes like oversized eyes or misplaced noses.
Drawing Realistic Eyes
The eyes are often considered the most expressive part of the face. To draw them realistically, focus on shape, spacing, and shading.
Eye Placement and Size
Use the guideline where the eyes sit, then mark the proper spacing. The general rule is that one eye-width fits between the two eyes. This gives a natural, balanced look.
Eye Shape and Details
Draw the almond shape lightly, then add the iris and pupil. The upper eyelid usually casts a shadow over the iris, so keep the upper portion slightly darker. Add the tear duct and lower eyelid curve for realism, but avoid outlining everything too harshly.
Adding Eyelashes
A common mistake is drawing eyelashes as straight lines. Instead, draw them in soft, curved strokes that follow the natural direction of growth. Keep them denser near the outer corners.
Shading Around the Eyes
Shading is what makes eyes look realistic. Add shadows under the brow bone, around the eyelids, and subtly beneath the eye. This creates depth and avoids a flat appearance.
Drawing the Nose Accurately
The nose can be challenging because it has few obvious lines. Realistic noses rely heavily on shading rather than outlines.
Basic Nose Structure
Start with a simple shape a small circle for the tip and two smaller circles for the nostrils. Connect them with gentle lines to form the base structure.
Bridge of the Nose
The nose bridge should be lightly suggested, not heavily outlined. Use soft strokes to indicate its form and width based on your subject.
Shading the Nose
To make the nose realistic
- Darken the nostrils slightly.
- Add shadows under and around the nose.
- Keep the highlights on the bridge and tip.
The contrast between shadow and highlight makes the nose appear three-dimensional.
Drawing Realistic Lips
Realistic lips rely on correct proportions and soft shading rather than sharp outlines.
Mouth Placement
The corners of the mouth generally align with the center of each eye. Use this guideline to keep the lips centered and proportionate.
Creating the Lip Shape
Start with the center line of the mouth. Then sketch the top lip’s bow shape and the fuller bottom lip. Keep your strokes light at first so you can adjust the shape easily.
Shading the Lips
To draw realistic lips
- Shade the upper lip slightly darker than the lower.
- Add highlights to the center of the lower lip.
- Blend any harsh lines for a natural look.
Pay attention to the subtle wrinkles and curves that make lips look realistic.
Building the Face With Shading
Shading is one of the most important steps in drawing a realistic face. It adds depth, emotion, and structure.
Identifying the Light Source
Determine where the light is coming from. This affects every shadow on the face. Shadows should be consistent; otherwise, the drawing will appear unrealistic.
Soft vs. Hard Shadows
Faces have mostly soft shadows. Use gentle shading on
- The cheekbones
- The sides of the nose
- The jawline
- The temples
Hard shadows are used sparingly, usually under the chin, under the nose, or around the eyes.
Drawing the Ears and Hair
While ears and hair may seem secondary, they contribute greatly to the realism of your artwork.
Drawing Ears
Ears align between the eye line and the bottom of the nose. Their internal structure is complex but can be simplified into curves and folds. Use shading to emphasize depth rather than drawing heavy outlines.
Drawing Realistic Hair
Avoid drawing individual strands. Instead, draw hair in large sections that follow the direction of growth. Add shadows between layers of hair and highlights where the light hits.
Refining the Overall Facial Structure
Once all the features are in place, refine the jawline, cheeks, and forehead. Smooth out unnecessary lines and adjust proportions as needed. This step ties all elements together into a cohesive, realistic face.
Blending and Smoothing
Use gentle strokes to blend shading areas. A soft blending tool or even a tissue can help you achieve smooth gradients. Avoid over-blending, which can make the drawing look flat.
Adding Final Details
Small details bring realism to life
- Light wrinkles or expression lines
- Freckles or small texture marks
- Soft shadows under features
- Subtle highlights on skin
Learning how to draw a realistic face takes time, but each attempt teaches you something new. Start with basic shapes, apply correct proportions, and then slowly build up details and shading. The more you practice, the easier it becomes to capture lifelike features and natural expressions. With patience and steady improvement, drawing realistic faces becomes an enjoyable and rewarding skill.