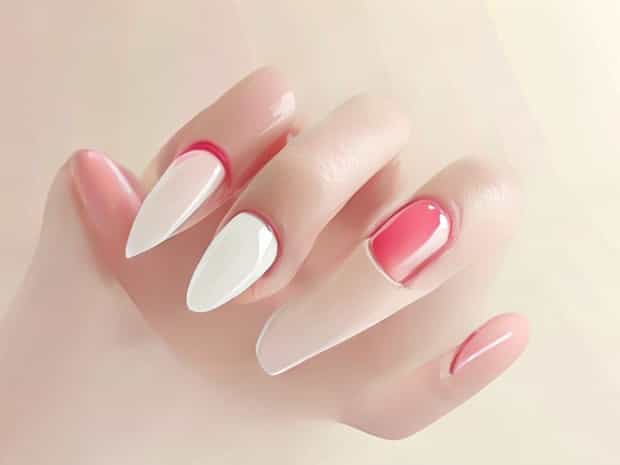
Gel X nails have become one of the most popular choices for nail enthusiasts who want the durability of acrylics and the natural look of gels. They are lightweight, flexible, and customizable, making them a favorite among those who love salon-quality nails at home. However, to achieve a polished and long-lasting finish, many people want to know how to encapsulate Gel X nails properly. Encapsulation not only enhances the look but also protects nail art, glitter, or other designs sealed beneath a smooth layer. Learning the right process can save time, reduce damage, and give your nails a professional appearance.
What Does Encapsulation Mean for Gel X Nails?
Encapsulation refers to the process of sealing decorative elements such as glitter, foil, dried flowers, or nail art under a clear protective layer. This technique locks in the design while providing a smooth finish that prevents chipping, peeling, or fading. For Gel X nails, encapsulation is typically done using builder gel, hard gel, or additional layers of top coat to create a strong shield. This makes the nails not only beautiful but also durable enough to last through daily wear.
Why Encapsulate Gel X Nails?
Encapsulation is not always necessary, but it offers several advantages for those who want long-lasting results. Some of the main reasons include
- Design ProtectionEncapsulation ensures that glitter, decals, or pigments do not chip or fade over time.
- DurabilityA sealed nail surface is stronger and more resistant to scratches.
- Professional FinishEncapsulation provides a smooth, glossy layer that looks salon-perfect.
- VersatilityAllows creativity with 3D designs, encapsulated flowers, or mixed-media nail art.
Tools and Products You Will Need
Before starting, it’s important to gather the right tools for the process. Here are the basics you’ll need to encapsulate Gel X nails
- Gel X nail extensions kit
- Base coat and top coat gel
- UV or LED nail lamp
- Builder gel or hard gel (for encapsulation)
- Nail art elements (glitter, decals, foils, flowers, etc.)
- Nail buffer and file
- Cuticle pusher and dehydrator
- Lint-free wipes and alcohol for cleansing
Step-by-Step Guide to Encapsulating Gel X Nails
Step 1 Prep Your Natural Nails
Start with clean, dry nails. Push back your cuticles, lightly buff the nail surface to remove shine, and clean with alcohol or a nail dehydrator. This helps the Gel X extensions adhere properly and ensures a longer-lasting application.
Step 2 Apply the Gel X Extensions
Follow the instructions of your Gel X kit by applying a base coat and curing it under the lamp. Attach the pre-shaped Gel X extensions using builder gel or the system’s adhesive gel, then cure again. Make sure the extensions are firmly attached with no air bubbles.
Step 3 Apply Base Layer for Encapsulation
Once the extensions are secure, apply a thin layer of base coat gel and cure it. This creates a smooth surface to hold your decorative elements in place before sealing them in with the encapsulation layer.
Step 4 Add Decorative Elements
Place your chosen nail art elements glitter, foil, flowers, or decals on the tacky layer of the cured base coat. Use a thin brush or tweezers for precision. Arrange them evenly and ensure they lie flat against the nail to prevent bumps.
Step 5 Encapsulate with Builder Gel
Apply a generous layer of builder gel or hard gel over the decorative elements. Spread it smoothly from cuticle to tip, making sure all the designs are fully covered. Cure the nails under the UV or LED lamp. Depending on the gel used, you may need to repeat this step for an extra-strong seal.
Step 6 Shape and Refine
After curing, use a nail file or buffer to smooth the surface and refine the shape of the nails. Wipe off the dust with a lint-free wipe soaked in alcohol. This ensures your nails look even and professional.
Step 7 Finish with a Top Coat
Seal the encapsulated design with a high-quality top coat gel. Cure one final time, then wipe off any tacky residue. The result should be a glossy, durable finish with your designs securely sealed underneath.
Common Mistakes to Avoid
Encapsulating Gel X nails can be tricky, especially for beginners. Here are some mistakes to watch out for
- Using too little builder gel, leaving parts of the design exposed.
- Not curing the gel properly, which can cause peeling or lifting.
- Applying designs that are too thick or raised, making it hard to encapsulate smoothly.
- Skipping nail prep, which can cause poor adhesion of the Gel X extensions.
Tips for Long-Lasting Encapsulation
To maximize the lifespan of your encapsulated Gel X nails, consider the following tips
- Always cure gel layers fully according to the lamp’s specifications.
- Use thin, even layers of gel rather than thick, uneven coats.
- Apply cuticle oil regularly to keep nails hydrated and prevent lifting.
- Avoid harsh chemicals or prolonged exposure to water without gloves.
How Long Do Encapsulated Gel X Nails Last?
With proper application and care, encapsulated Gel X nails can last anywhere from 2 to 4 weeks. The longevity depends on nail prep, product quality, and daily habits. Encapsulation adds extra strength, making them more durable than regular Gel X applications.
Is Encapsulation Suitable for Beginners?
Encapsulation requires some practice, but it is not overly complicated. Beginners may need a few attempts to perfect the process, especially when working with 3D nail art. Starting with simple designs like glitter encapsulation can help build confidence before moving to more complex elements.
Encapsulating Gel X nails is a fantastic way to protect nail art, add durability, and achieve a professional-looking finish at home. By following the right steps prepping nails, applying extensions, adding designs, and sealing them under layers of gel you can create long-lasting and stylish nails. With practice and the right products, encapsulation becomes a valuable technique for anyone who enjoys experimenting with nail art and maintaining salon-quality results.